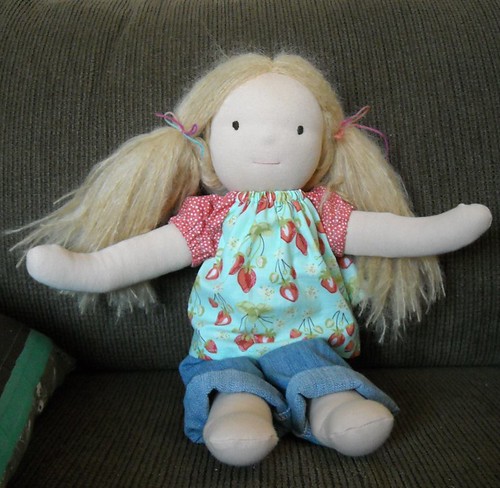
Here is Baby Maggie, short for Magpie. My husband has named several of the dolls in our house, including this one. The other dolls, because I know you wanted to know, are Baby Lucy, Baby Ruby, Baby Abby (named by the boys), and Baby Arabella (I picked that name). The old baby that used to be J's doesn't have a name.
I enjoyed making Maggie, even though it was kind of stressful because I was trying to do it in secret before Christmas and my daughter was having a difficult time sleeping the nights I wanted to work on her.
Here's some of the information about making this kind of doll, if you're interested:
I got the kit to make her from Weir Dolls and Crafts. It included "skin" fabric with the pattern printed on it, yarn for the hair, thread for sewing the body and hair, wool stuffing, embroidery floss for the eyes and mouth, and the stockinette and string for making the head. I purchased doll needles at a local craft store--you need a long needle because sometimes you are sewing through the head.
I worried a lot about doing the stuffing just right, and I think I did ok, but it's the kind of thing where you probably get a lot better at it each time you do it. I think I ended up stuffing the arms a bit too firm.
I did the hair using the 3-layer hair tutorial at Ashtabeulah. I wasn't sure if I should do it this way or with the more traditional crocheted cap/stranded method I read about elsewhere, but I liked how the hair looks on the dolls from Tumbleberry Toys and Bamboletta so I decided to go with the sewn hair. If I make another doll like this, I will probably try a smaller one (I made the 16" doll this time) and try some fun hair colors.
The kit I bought came with a clothing pattern--I modified the shirt/dress pattern to have short sleeves and made the pants out of lightweight denim. I think it would be fun to make her a sweater, some underwear, and cute shoes someday too. :)


4 comments:
This is really darling. I want to make a couple. I had grand intentions of making them for my boys and my nieces and nephews before Christmas, but around October I realized it wasn't going to happen. There's always next year, right?
You did a great job!
What a cutie! I made 3 of these dolls for my girls for Christmas but I followed a tutorial I found on Flickr. I've only made pj's so far for them. Hoping to make some more clothes soon.
You are amazing, daughter of mine. I love seeing all your projects. It inspires me to get working on mine. Love ya lots,
Mom
I love thus little doll! So sweet! Your clothes are adorable too! Makes me want to try one....but my DD is in middle school now. *sigh* You did a great job!
Rebekah
Post a Comment