Hello! I've been wanting to do a couple of additions to my original quilt binding tutorial for a while, and I was finally able to take some photos when I bound my last quilt. This is a tutorial for finishing up the ends of a quilt binding with a diagonal seam. Instructions on getting your quilt binding to this point are here, but you will not sew down a "pocket" of binding at the beginning as shown in that post.
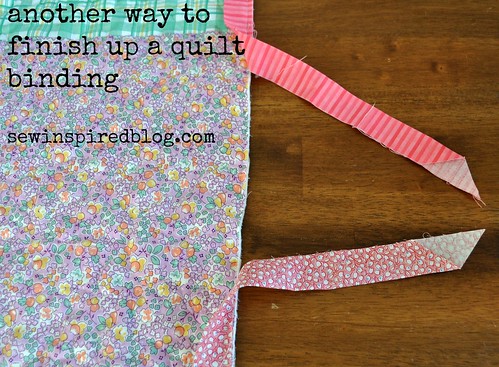
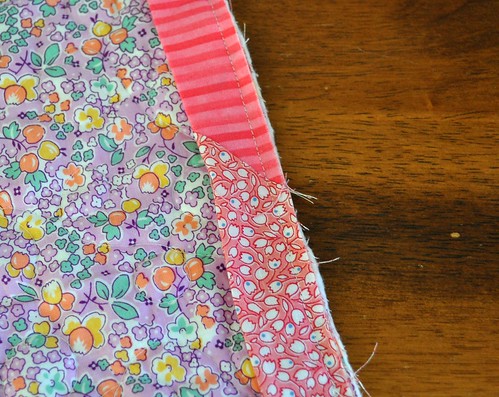
Step 1: Apply your quilt binding to the quilt, leaving about 6-8 inches of binding unsewn at both ends. Make sure the two ends of the binding overlap by at least 3-4 inches. (see photo above)
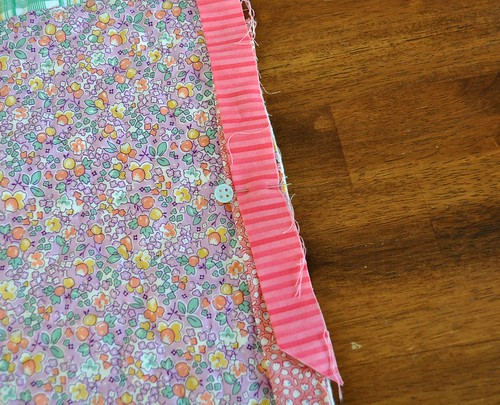
Step 2: Lay both ends of the binding fabric along the edge of the quilt, overlapping them. Mark the center of the overlap with a pin or a water soluble marker.
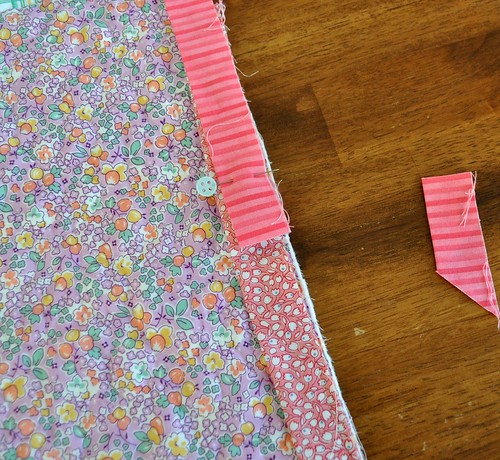
Step 3: Cut off the top binding strip about 1.5 inches from the pin.
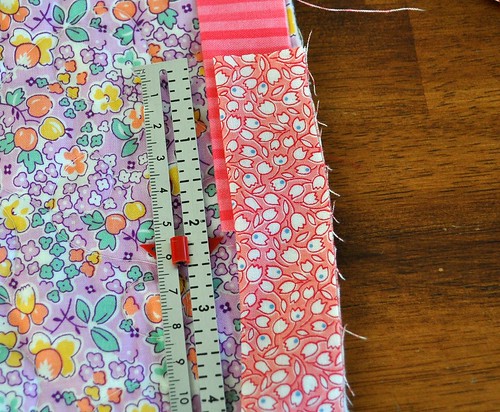
Step 4: Rearrange the binding strips so the one you just cut is on the bottom. Now you will cut the top strip. You'll need to measure the other binding strip before you cut it. The measurement needs to be the same as the width of your binding before you folded it, minus about 1/16". For example, I usually do a 2.25" binding, so I will cut my binding pieces so they overlap just a little bit less than 2.25". I used my trusty seam gauge from 8th grade sewing class to show the measurement here (see photo below). If your quilt binding is 2.5" then cut your strips so they overlap slightly less than 2.5".
The reason for making the overlap slightly smaller is that the binding strips will probably stretch a little when you sew them down to the quilt, and the sewing machine will also ease the lower quilt layer so it fits the slightly shorter binding section. In the past, when I would sew this last section of quilt binding down without making it slightly shorter I would almost always end up with too much binding and it would either end up puckered or I would have to redo it to make it look right. Making the binding slightly shorter eliminates that problem.
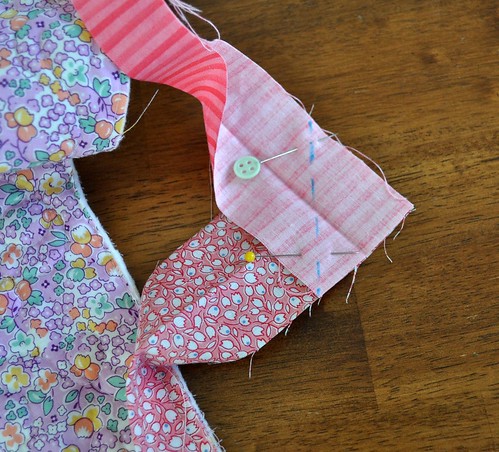
Step 5: Fold the bulk of the quilt out of the way, unfold your binding strips, and arrange them with right sides together and at a right angle, as shown in the photo below. Pin them together and draw a diagonal line from corner to corner.
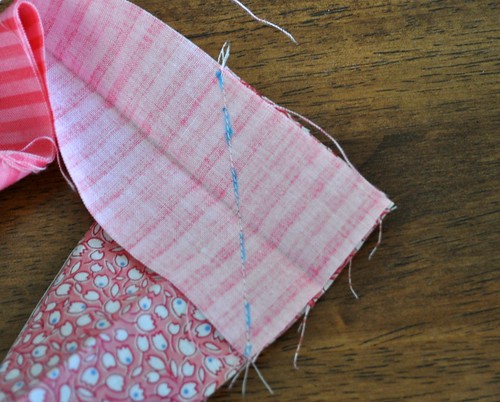
Step 6: Sew the binding strips together on the line you just drew. Backstitch at the beginning and end of the seam.
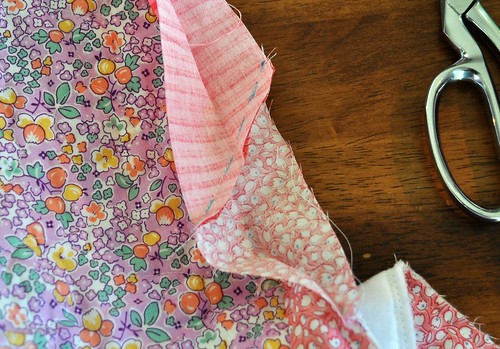
Step 7: Unfold the binding and stretch it out along the edge of the quilt to make sure it will fit.
Step 8: If it fits right then trim the seam allowance to 1/4". If it seems too long then you can undo your seam and remeasure your binding pieces. If it is too short then... oh dear. You will probably need to undo your stitching several inches and add another, longer binding strip, and then start over. This shouldn't be a problem though if you measure carefully before you cut!
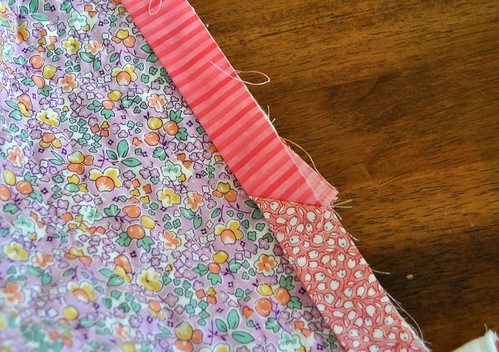
Step 9: Sew the binding down to the quilt.
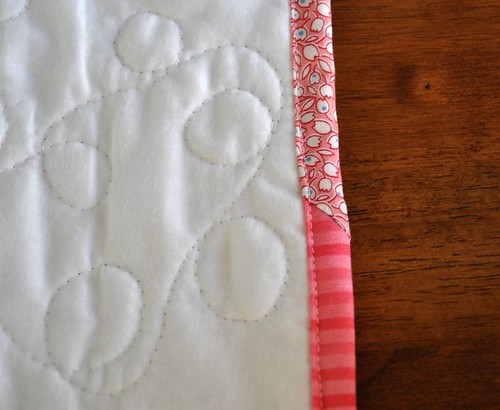
Step 10: Finish the binding the way you choose. I machine stitched the binding down this time; sometimes I do it by hand.

Super helpful! I will test this out soon as I have 2 quilts to bind. :)
ReplyDeleteThanks for this helpful tutorial (and the original one too!) I am a newbie to quilting and getting all the help you expert quilters can give is priceless!
ReplyDeleteThanks again
Stacey
the photo for step 5!!! it's the one i can never figure out!!! i took a picture of my own once, just to refer back to! great photos of the process.
ReplyDeleteI'm going to do a binding tomorrow and will try this. I'm looking forward to a simple method. Thanks so much.
ReplyDeleteThanks for the very helpful tutorial :)
ReplyDeleteGreat how-tos and photos! Very helpful... thanks.
ReplyDeleteFabulous tutorial. It is just how I finish my ends :o)
ReplyDeleteI used this today and it was great! Thanks!
ReplyDeleteThank you so much for this tutorial! I glue baste my bindings, but I always come back to your tutorial for how to finish the ends, as it's the best EVER! Thanks for sharing it :)
ReplyDeleteI wish you had shown a picture of the reverse side after machine finishing the binding...No one ever does and I am anxious to see how the reverse looks...I am afraid to attempt it without seeing what it looks like
ReplyDelete